Setting up a new python project with Cookiecutter#

../../../_images/example_project.png

Every so often, I need to set up a new repository for a python project including a lot of boilerplate. Because you only set it up once I always spend a lot of time googling best practices and reinventing the wheel. To resolve this once and for all I decided to make a template tailored to my own preferences.

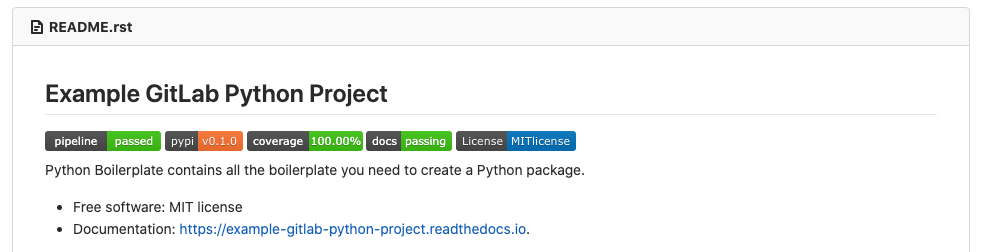
You can find it on GitLab: gitlab.com/AdriaanRol/cookiecutter-pypackage-gitlab along with an example project.

Here I documented my best practices and how to use this template.

I host my projects on Gitlab because I find it to be slightly better than Github in pretty much all aspects. The only thing for which I find Github better is for getting public exposure.

The things I want for any project before I get started are the following.

Requirements:

  • Hosted on GitLab

  • setup.py that is compatible with pypi.

  • Automated test build that runs tests and reports coverage.

  • Sphinx documentation that builds and is hosted on readthedocs.

  • Fancy buttons that show project status.

  • Comes with requirements set up that I like.

  • Coverage reports integrated with GitLab.

  • Set up notification bots for slack.

Step 1. Set up a project using Cookiecutter#

Start by creating a “blank” project on GitLab. Be sure to note down the name and project_slug, you’ll be needing that later. Do not initialize the repository with a readme. After setting up the project using cookiecutter locally (see below), we’ll be following the instructions for pushing an existing folder shown by GitLab.

The next step is to set up the folder structure of the project. This can be quite a tedious project so we use Cookiecutter to do this for us. Cookiecutter is a framework to generate a folder structure based on a template. Here, we will not focus on how to use Cookiecutter to create a template but just use an existing template. I have created a template for this purpose, you can find it here. Alternatively, you can use the pypackage template by Audrey Feldroy the creator of Cookiecutter, or the scientific python cookiecutter mostly because of its extensive documentation. The docs of this project also go into some best practices

python3 -m pip install --upgrade cookiecutter
cookiecutter https://gitlab.com/AdriaanRol/cookiecutter-pypackage-gitlab

The command line interface will ask you to provide the following information:

  • full_name : Your name

  • email : Your email

  • gitlab_username : Your GitLab username

  • project_name : The project name

  • project_slug : The slug of the python project. This is auto populated based on the project_name where spaces and dashes are replaced to get a valid name.

  • project_url : The url of the GitLab project. This is auto populated based on the project_slug and username but if you are adding the project to an organization or group this can be different.

  • project_short_description : A short description of the project.

  • pypi_username : Your PyPI username

  • copyright_holder : The name of the copyright holder. Defaults to “full_name”, but can be different if setting up a commercial project.

  • version : The current version, defaults to 0.1.0.

  • create_author_file : If True, creates an “authors” file

  • open_source_license : Select a predefined license

You can test if the cookiecutter worked correctly by running the following commands

pip install -e .                       # install the package locally
pip install -r requirements_dev.txt    # install development requirements
py.test                                # run a dummy test using the local environment
tox                                    # run the tests using the tox environment. Takes some time as it also installs the requirements.
sphinx-autobuild docs docs/_build/html # build the docs and host at localhost:8000

If it is working correctly you can now push to the repository you created using the following commands.

cd project_slug
git init
git remote add origin git@gitlab.com:gitlab_username/project_slug.git
git add .
git commit -m "Initial commit"
git push -u origin master

The presence of the .gitlab-ci.yml file should ensure that a test build is triggered upon the first push.

Step 2. Set up documentation (manual)#

Host documentation on readthedocs#

The repository comes with a .readthedocs.yml file which ensures the project can be imported. If you repository is public you can host it for free on readthedocs.org. Sign in using your GitLab account and import your package.

Show build status and coverage#

Badges need to be created manually on GitLab.

We will be adding two badges, the pipeline status and coverage badges. You will need to manually add them in the GitLab interface in order for the project badges to work. To do this go to your project, settings/general/badges, select “Add Badge” and enter the following information:

  • Name: Pipeline Status

  • Link: https://gitlab.com/%{project_path}/-/pipelines/%{default_branch}

  • Badge Image URL: https://gitlab.com/%{project_path}/badges/%{default_branch}/pipeline.svg

  • Name: Coverage

  • Link: https://gitlab.com/%{project_path}/-/pipelines/%{default_branch}

  • Badge Image URL: https://gitlab.com/%{project_path}/badges/%{default_branch}/coverage.svg

The CI/CD is set up to automatically report the coverage of each pipeline. The flake8 and coverage reports can be downloaded from the test pipelines as artifacts.

It is also possible to integrate the coverage.xml reports with merge requests. According to the GitLab documentation, the current version should already work. However, this doesn’t seem to be the case. I’ll update this post (and the template) when I resolve this issue.

Upload to PyPI#

Once you have made some commits and are ready to release your package on PyPI upload the package to PyPI. The setup.py should already be compatible with PyPI. You can check out my previous post on uploading a package to PyPI.

Comments

Comments by giscus, use a GitHub account to comment.